I live within walking distance of a fabric store. Sometimes this is good, like when I am in the middle of a project and I realize I forgot to buy something. Sometimes, this is not so good, and it is more of a temptation.
Today, while I was taking a shower, I realized that Julian HAD to have a viking hat. Today. And then I went shopping.
I don't really know how to sew. I usually just decide that I can do something, and then it either works, or I fall flat on my face. Today I did pretty well. I even managed to do this entire project during Julian's afternoon nap. He took an abnormally long nap today, but still.
I used this tutorial for the hat, as well as that author's tutorials for ear flaps and ears (for the horns). The links are at the bottom of her tutorial.
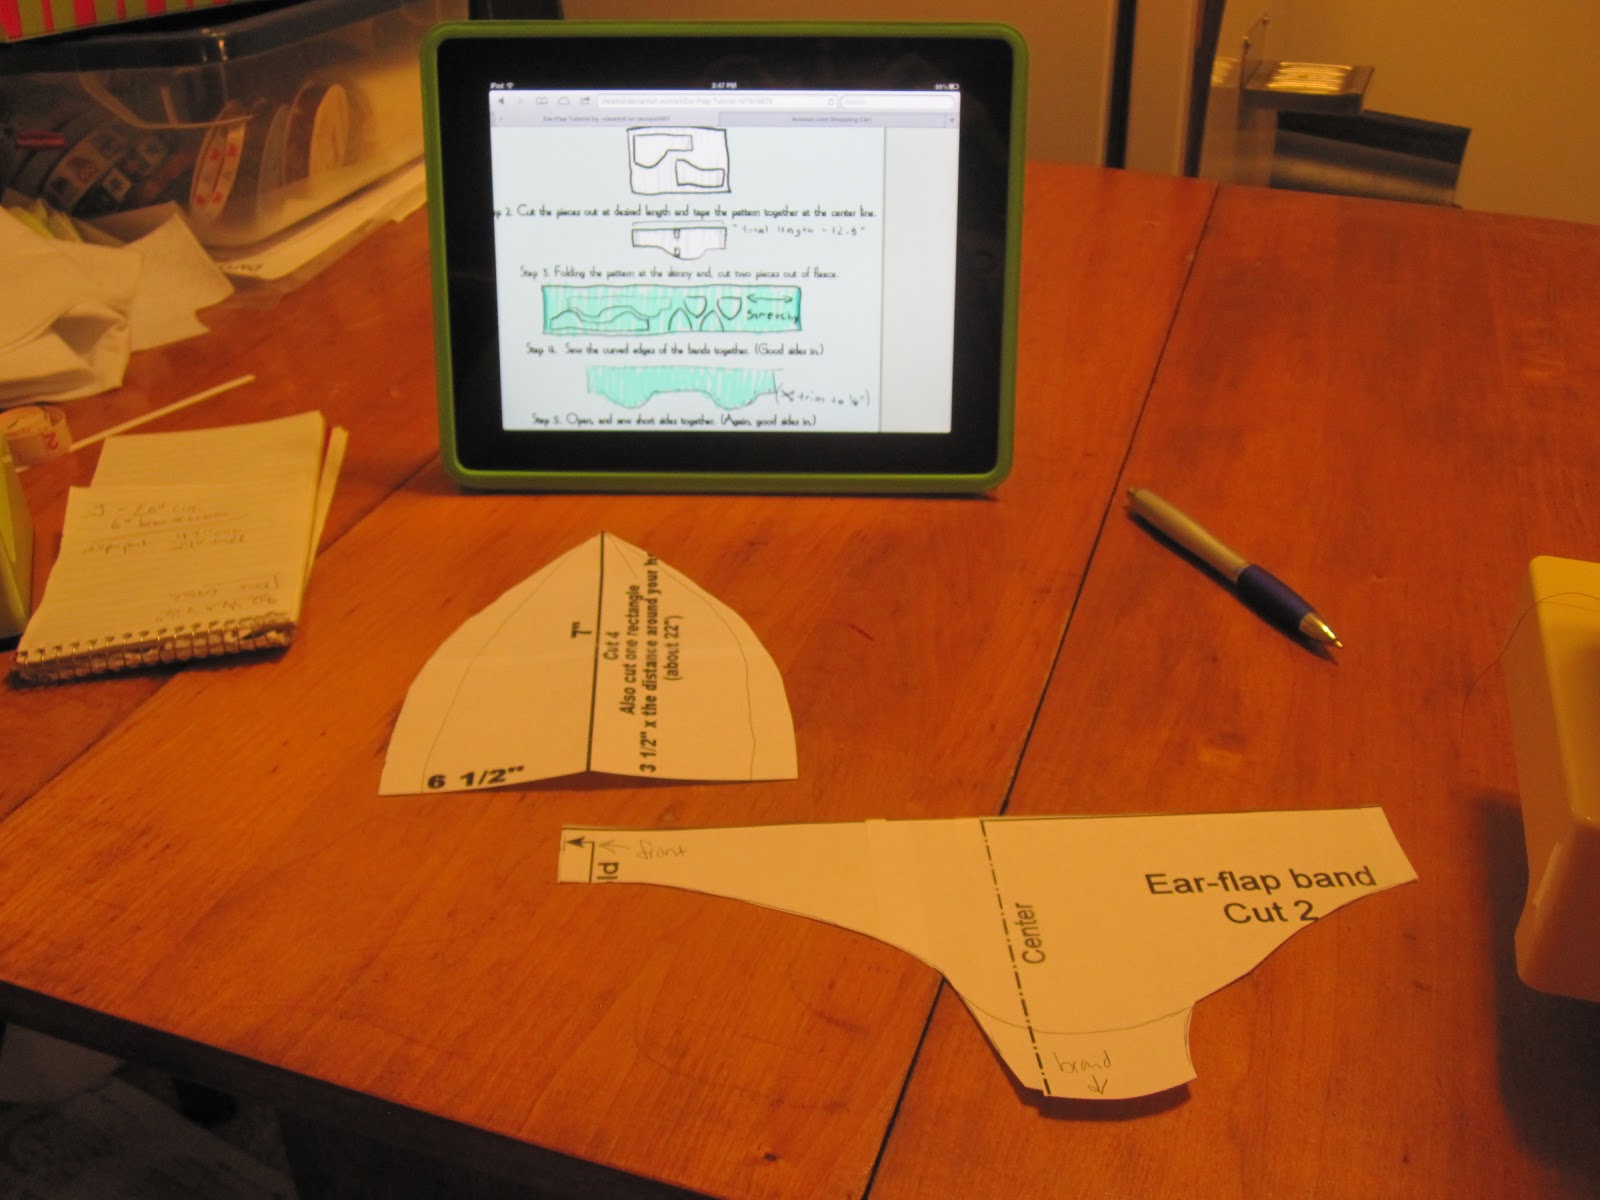
Here I'm getting set up. I have cut out the pattern pieces, and I am modifying them to fit Julian's head. I have my iPad set up with the tutorials on screen.
I'm getting started on the sewing! I drew the horns free-hand. Yes, I use a lot of pins. I'm not very good at this, remember?
Hey, it's just about done! Yeah, I neglected to take more process photos. I was in a bit of a hurry to finish while Julian slept. From here, I cut the long "ear flaps" into three strips to braid.
Someone just woke up, and doesn't know why he's wearing a hat.
Here's a better shot. It's not perfect, but I must say I'm pretty proud of myself. Now we're all ready for the football game tomorrow! Go Vikings!
Saturday, November 10, 2012
Friday, November 9, 2012
Rajmah: Healthy Comfort Food
I love rajmah. What is it? Curried kidney beans, or "Indian Chili," as I like to think of it. It is hearty, healthy, super inexpensive, and perhaps best of all, crazy easy to make. And by crazy easy, I mean you can get this prepped and in your crock pot while your morning pot of coffee is brewing.
This recipe is adapted from The Indian Slow Cooker by Anupy Singla. I love this book. I toned down the heat (spice) for this recipe. I liked it as written, but had to add yogurt or sour cream to eat it. Also, I like to share the food I make with my little boy, and I don't really want to burn his face off. I also adjusted a few ingredients and the preparation to speed things up a little more.
Here is what you need:
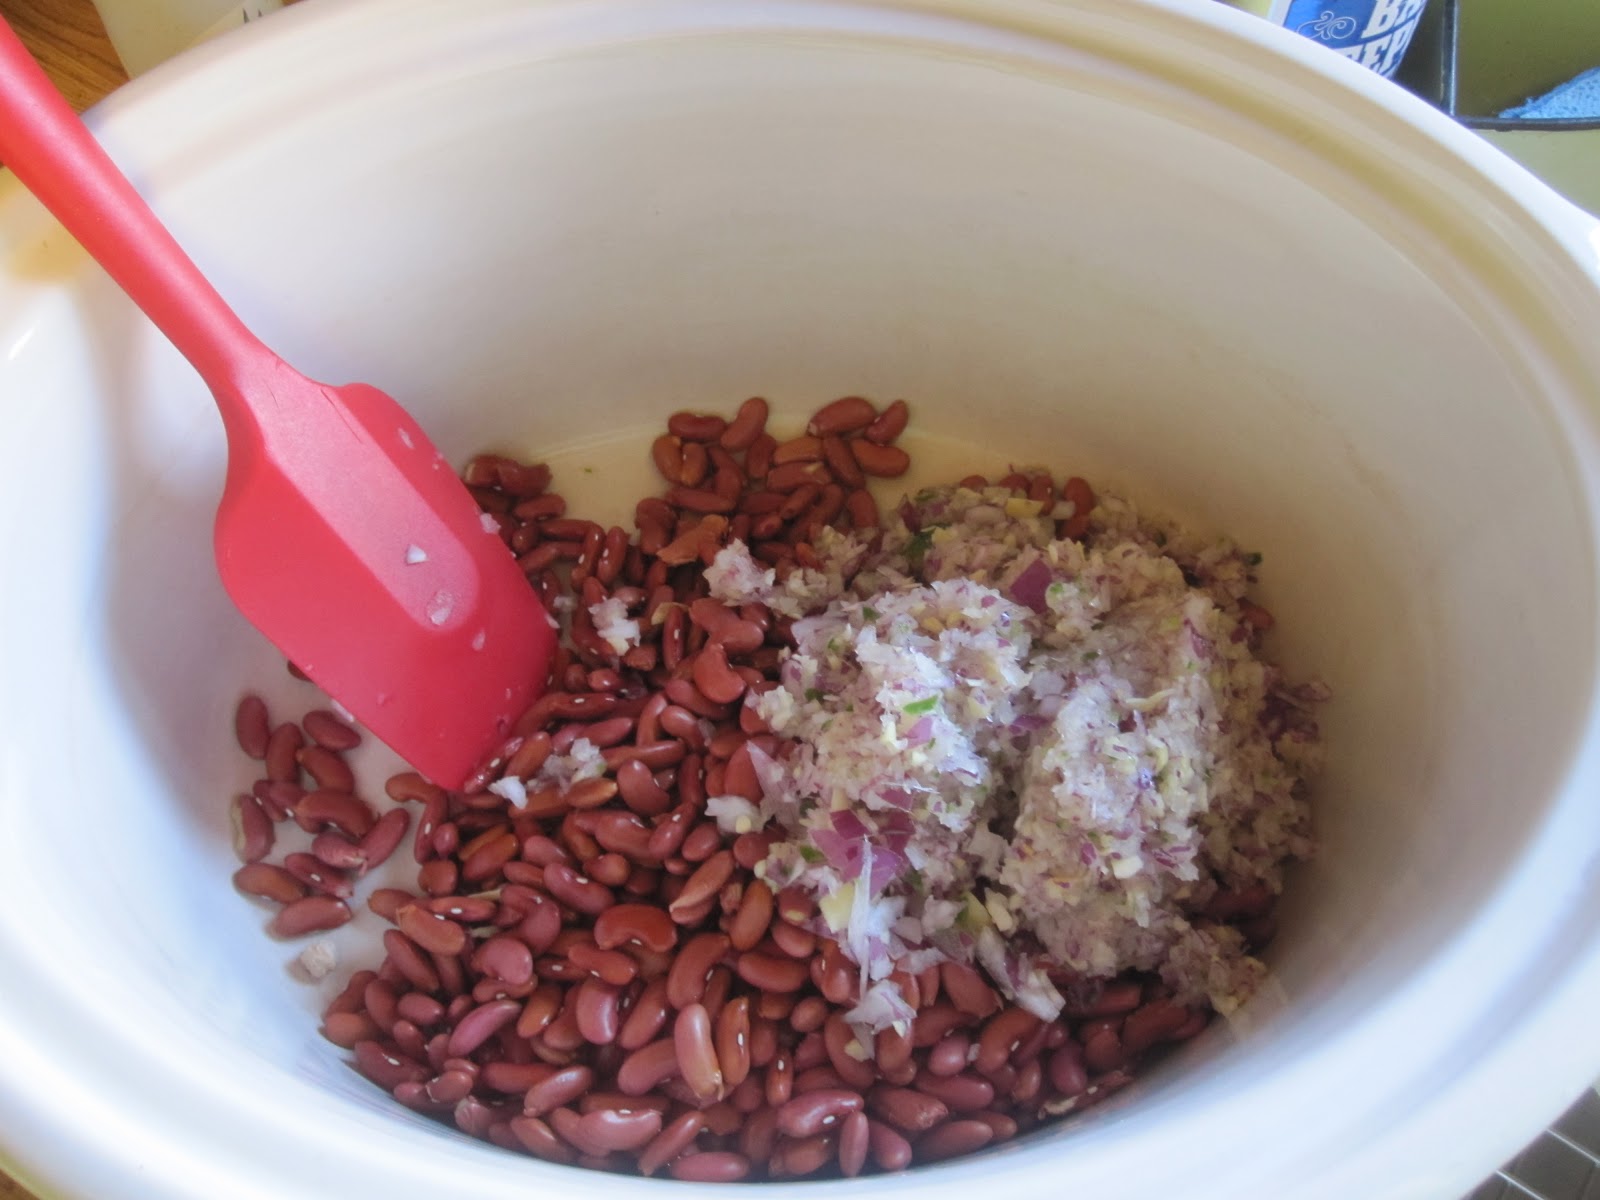
Put your clean beans in your crock pot.
Get your vegetation ready, preferably while a toddler tries to climb up your leg. He probably needs something, like breakfast, or a tissue.
Next up, put your vegetation in your food processor, and pulse until it is finely chopped, but not yet a puree. I used a red onion, because that is what I had in the cupboard. Use what you want. Also, be cautious when opening your food processor. It sort of feels like you've been maced if you put your face too close to the work bowl when you open this bugger up.
Add your processed vegetation to the crock pot. (See, it's easy!)
Try and fail to distract the little boy who keeps trying to climb up your pant leg with some banana slices. I wonder if he's trying to booby trap my chair?
Assemble your spices. If you are worried about this dish being too spicy for you, cut back on the cayenne pepper. I feed this dish to my one-year-old, though, so take that into account.
Toss the spices into the crock pot, and add the eight cups of liquid and the can of tomatoes (un-drained). Stir it up, lid it up, and set it to high. Dinner will be ready in ten to eleven hours. Oh, and I know it looks like pond scum now, but I promise it will be tasty!
Eleven hours later: much better! Mash up some of the beans to thicken things up. You can either spoon some out to puree in a blender, use an immersion blender, or do what I do and just smoosh some beans against the side of the pot with the back of a spoon. Serve over rice or with bread, or just eat it with a spoon. Enjoy!
This recipe is adapted from The Indian Slow Cooker by Anupy Singla. I love this book. I toned down the heat (spice) for this recipe. I liked it as written, but had to add yogurt or sour cream to eat it. Also, I like to share the food I make with my little boy, and I don't really want to burn his face off. I also adjusted a few ingredients and the preparation to speed things up a little more.
Here is what you need:
- 1 pound dried red kidney beans, picked through and washed
- 1 medium onion, peeled and quartered
- 1 14.5 ounce can diced tomatoes
- 1 two-inch piece of ginger, peeled
- 3 cloves garlic, peeled
- 1 serrano chile, stem removed
- 3 whole cloves
- 1 cinnamon stick
- 1 tablespoon cumin seeds
- 1 teaspoon cayenne pepper
- 1 tablespoon salt
- 1 teaspoon turmeric powder
- 1 teaspoon garam masala
- 8 cups of water, broth, or stock
Get your vegetation ready, preferably while a toddler tries to climb up your leg. He probably needs something, like breakfast, or a tissue.
Next up, put your vegetation in your food processor, and pulse until it is finely chopped, but not yet a puree. I used a red onion, because that is what I had in the cupboard. Use what you want. Also, be cautious when opening your food processor. It sort of feels like you've been maced if you put your face too close to the work bowl when you open this bugger up.
Add your processed vegetation to the crock pot. (See, it's easy!)
Try and fail to distract the little boy who keeps trying to climb up your pant leg with some banana slices. I wonder if he's trying to booby trap my chair?
Assemble your spices. If you are worried about this dish being too spicy for you, cut back on the cayenne pepper. I feed this dish to my one-year-old, though, so take that into account.
Toss the spices into the crock pot, and add the eight cups of liquid and the can of tomatoes (un-drained). Stir it up, lid it up, and set it to high. Dinner will be ready in ten to eleven hours. Oh, and I know it looks like pond scum now, but I promise it will be tasty!
Eleven hours later: much better! Mash up some of the beans to thicken things up. You can either spoon some out to puree in a blender, use an immersion blender, or do what I do and just smoosh some beans against the side of the pot with the back of a spoon. Serve over rice or with bread, or just eat it with a spoon. Enjoy!
Thursday, November 8, 2012
Anniversary
Four years ago, I got married to my favorite person.
He makes me laugh, and I'm pretty sure I make him laugh. I hope he's laughing with me more often than he's laughing at me, but I will take what I can get. You can never have enough laughter in your life.
I'm not going to say that I can't imagine my life without him, because that isn't true. Life would probably be easier, but it sure wouldn't be nearly as much fun. Besides, I kind of enjoy his company.
Damian is smart, witty, funny, loyal, and hard-working. He is a wonderful husband, and a fabulous father. For some reason he loves me, despite my flaws.
Oh, and did I mention how handsome he is?
Yeah, I'm a pretty lucky gal.
It's been a great four years. Here's to forty more. Heck, I'll take as many years with you as I can get. Happy anniversary, Damian. I love you.
Monday, November 5, 2012
Ris-oat-to
A month or so ago, I stumbled across a recipe contest through a regional grocery store chain. The contest was for recipes using steel cut oats. As it happened, I had come up with a somewhat unusual use for oatmeal, so I sent in my recipe, and I won!
I came up with this recipe one night after I had put the baby to bed. I was tired, hungry, and all I really wanted was a big bowl of cheesy carbs. Isn't this what all girls want out of life? A bowl of cheesy carbs? Well, I was out of pasta and couscous, my usual go-tos, but I had a bunch of steel cut oatmeal. I call this dish "risOATto" because (a) I am a dork, and (b) it is cooked a lot like risotto is, but it uses oatmeal instead. Here's what you need:
Start by bringing your broth/stock to a boil in a medium saucepan with your garlic powder, Italian seasoning/basil, and salt, if using. I make and can my own turkey stock, so that's what I use.
Once your stock is boiling, stir in the cup of oats. Reduce heat to a simmer and cook uncovered until most of the liquid has been absorbed and the oats are tender. Stir often, or you will regret it (and have a big mess to deal with). This takes about 20 minutes.
While the oats are simmering, slice the sun dried tomatoes. I grew and dried these cherry tomatoes, and since they are already small, I just snipped them in half with kitchen shears.
Also get your spinach ready to roll. I am a fan of minimizing dirty dishes, so I put my prepped veggies in the bowl I plan to eat out of.
Try not to trip on the oven mitt thief. Also laugh at his too-large pajamas.
When you oatmeal is cooked, stir in the tomatoes and frozen spinach. Simmer a few minutes longer, just until the tomatoes have re-hydrated and the spinach is warm.
Serve it up with a sprinkle of pine nuts and Parmesan on top. You can use this as a side dish instead of pasta or rice, or as an entree. Add diced cooked chicken or smoked sausage if you want, or different veggies. This is an easy way to use up leftovers, and if you call it "upcycling" your leftovers, you sound all hip and green.
Enjoy your oatmeal for dinner!
I came up with this recipe one night after I had put the baby to bed. I was tired, hungry, and all I really wanted was a big bowl of cheesy carbs. Isn't this what all girls want out of life? A bowl of cheesy carbs? Well, I was out of pasta and couscous, my usual go-tos, but I had a bunch of steel cut oatmeal. I call this dish "risOATto" because (a) I am a dork, and (b) it is cooked a lot like risotto is, but it uses oatmeal instead. Here's what you need:
- 1 quart of stock or broth (flavor is dealer's choice)
- 1 cup of steel cut oats
- 1/2 to 1 teaspoon granulated garlic
- 1/2 teaspoon Italian seasoning blend or dry basil
- 1/2 cup sun dried tomatoes
- 1 cup frozen chopped spinach
- Pine nuts
- Parmesan cheese
- Salt to taste (optional)
Start by bringing your broth/stock to a boil in a medium saucepan with your garlic powder, Italian seasoning/basil, and salt, if using. I make and can my own turkey stock, so that's what I use.
| The label explains why garlic goes in everything. |
Once your stock is boiling, stir in the cup of oats. Reduce heat to a simmer and cook uncovered until most of the liquid has been absorbed and the oats are tender. Stir often, or you will regret it (and have a big mess to deal with). This takes about 20 minutes.
While the oats are simmering, slice the sun dried tomatoes. I grew and dried these cherry tomatoes, and since they are already small, I just snipped them in half with kitchen shears.
Also get your spinach ready to roll. I am a fan of minimizing dirty dishes, so I put my prepped veggies in the bowl I plan to eat out of.
Try not to trip on the oven mitt thief. Also laugh at his too-large pajamas.
When you oatmeal is cooked, stir in the tomatoes and frozen spinach. Simmer a few minutes longer, just until the tomatoes have re-hydrated and the spinach is warm.
Serve it up with a sprinkle of pine nuts and Parmesan on top. You can use this as a side dish instead of pasta or rice, or as an entree. Add diced cooked chicken or smoked sausage if you want, or different veggies. This is an easy way to use up leftovers, and if you call it "upcycling" your leftovers, you sound all hip and green.
Enjoy your oatmeal for dinner!
Wednesday, October 31, 2012
Happy Halloween
Tuesday, October 30, 2012
Squash Puree
What a drizzly, cold autumn day. What's a girl to do?
Oh hey! A big pile of winter squash. I know these buggers are supposed to keep well as they are, but last year I had a bunch go all squishy on me (all over the windowsill of the bow window), and if there's one thing I hate, it's wasting food. Besides, any project where I get to use a meat cleaver and a rubber mallet is totally worth my time.
Why the meat cleaver and mallet? Well, squash are kind of tough to cut up, the roll when you least want them to, I am clumsy, and I would really like to keep all my digits.
| Cleaver placement. |
| Part way through. |
| Ta-da! |
For the butternut squash, I just cut off the necks with a knife.
After cutting all the squash you want to roast, scoop out the seeds and stringy pulp. I find a grapefruit spoon to work best for that icky task. Then put your squash cut-side down in baking dishes, and put about an inch of water in each dish. This helps to keep the squash moist, and keeps it from fusing to your dishes. Bake at 350 degrees and check it after about an hour. It's done when you don't feel any resistance when poking it with a knife.
Allow the squash to cool a while. No one wants blisters on their hands.
When the squash is cool enough to handle, scoop the flesh into a food processor and whiz it up.
You can package your squash puree however you prefer, but I like to measure it so I know what I'm dealing with. Two-cup portions works well for me, so that's how I bag it.
I package my squash in quart size Ziploc freezer bags. I find it helpful to label each bag with what it is, the quantity, and the date. Squeeze out the air, and flatten the bags out. I freeze mine on a sheet pan, then store them upright in a box once they are frozen solid.
Since I didn't add any seasonings to my puree, I can use the squash in sweet or savory dishes. I can make soups, pies, or just serve it up plain.
Thanks for stopping by, and enjoy those winter squash!
Monday, October 29, 2012
The Knitting Machine
Last week I went to Hobby Lobby unsupervised with a head full of half-formed ideas. Very dangerous. Luckily I managed to spend less than an hour there, and left with a reasonable amount of merchandise. I probably bought more than I should have, but I didn't go totally overboard. I'm calling it a win.
A few years ago, my mother-in-law gave me a knitting machine that had belonged to her mother-in-law. I had never knitted before, and had never heard of a knitting machine before, but what the heck? After letting it hang out in its box for several months, I dove right in and made a baby blanket for my nephew. Well, by "dive right in" I mean that I made a lot of tangled messes, watched a bunch of YouTube videos about knitting machines, then figured out what I was doing enough to make a baby blanket. Since then I have made a few scarves for family, and one mess that is still incomplete, and will probably stay that way. It has been about a year since I used the knitting machine (probably because I spend most of my time chasing a baby), and I felt like giving it another go.
I won't try and write a tutorial here, since I am probably the last person you want to have as a teacher. If you're curious, Google it, and watch some of the YouTube videos that pop up. I found them very helpful, and if a craft-impaired person like me can figure this out, I have no doubt that you can, too.
If my half-formed idea turns into an actual complete project, I will be sure to post an update. For now, I'm just having fun poking away at this, and enjoying the pretty colors I picked out. It may take me a little while to get it finished, since I only get to work in nap-length increments.
Thanks for stopping by!
A few years ago, my mother-in-law gave me a knitting machine that had belonged to her mother-in-law. I had never knitted before, and had never heard of a knitting machine before, but what the heck? After letting it hang out in its box for several months, I dove right in and made a baby blanket for my nephew. Well, by "dive right in" I mean that I made a lot of tangled messes, watched a bunch of YouTube videos about knitting machines, then figured out what I was doing enough to make a baby blanket. Since then I have made a few scarves for family, and one mess that is still incomplete, and will probably stay that way. It has been about a year since I used the knitting machine (probably because I spend most of my time chasing a baby), and I felt like giving it another go.
| The knitting machine |
I won't try and write a tutorial here, since I am probably the last person you want to have as a teacher. If you're curious, Google it, and watch some of the YouTube videos that pop up. I found them very helpful, and if a craft-impaired person like me can figure this out, I have no doubt that you can, too.
| Casting on and ready to go. |
| The first several rows. |
If my half-formed idea turns into an actual complete project, I will be sure to post an update. For now, I'm just having fun poking away at this, and enjoying the pretty colors I picked out. It may take me a little while to get it finished, since I only get to work in nap-length increments.
Thanks for stopping by!
Subscribe to:
Posts (Atom)