Monday, January 14, 2013

Chocolate Milk Stout: Brewing

Damian got a beer making kit for Christmas.  Let's make beer!  His first batch was an ESB, which is being force-carbonated in our kegerator now.  This is our second batch.  I voted for a chocolate milk stout.  We are not awesome enough (or ambitious enough) to attempt an all-grain recipe yet.  So, we bought a kit with malt syrup.


Sounds good!


Step one for brewing beer is to wash and sanitize EVERYTHING.  Dirty gear will lead to skunky beer at best.


No one complains about doing dishes when it leads to five gallons of beer (he never complains about dishes, really).

While Damian worked on the tedious cleaning job, I put two and a half gallons of (bottled) water in our stock pot.


Then I added the grain and turned the burner on high.  Also, the jug of malt syrup is in a pot of water over very low heat.  It's thick, sticky stuff, so it helps make it more pour-able to warm it up some.  There is a towel on the bottom of the pot to keep the jug from getting too warm.

Giant tea bag of cracked, roasted grain.
This is either very young beer, or the most disappointing tea ever.

We steep the grain until the water reaches 170 degrees Fahrenheit.

Probe thermometers with temperature alarms are the best!

Damian is pressing the liquid out of our giant tea bag.

Next we brought the brew to a boil, took the pot off the heat, and added our sugars.

Adding the malt syrup.  This stuff tastes so yummy!

Adding the lactose.  This is what makes it a milk stout.

Once the sugars were stirred in, we put the pot back on high heat and brought it back to a boil.  Now we got to start calling the brew a "wort."  This is fancy talk for "young beer."  Once the wort was back at a boil, it was time to add some hops.


Hop pellets:  they look like rabbit food.


The wort was boiled for 30 minutes, then another round of hops was added in.

Only 1/2 ounce this time.

We boiled the wort for 30 more minutes, then cooled it down as quickly as possible.  It's important to get the wort below 100 degrees Fahrenheit as quickly as possible.  We did this by putting a bag of ice in the primary fermenter (big, sanitized bucket) and pouring the wort over the ice.  Then we added enough cold bottled water to bring the total volume up to five gallons.

The ice goes in.


Then the hot wort goes in.
Next up, we needed to aerate (stir) the wort so the yeast would have enough oxygen to be happy, eat sugar, and make our beer worth drinking.


Science time!  We took a small sample of the wort to check the specific gravity of the mixture.

Fun with a hydrometer.  The specific gravity was 1.052, which is what we were aiming for.

Once the wort dropped below 80 degrees, it was safe to add the yeast.


Keeping it clean:  the yeast packet, the scissors used to cut it open, and the gloves I am wearing were all sanitized.  The yeast are the only micro organisms invited to this party!

And now we wait.  The beer will hang out for about a week in the primary fermenter, then we will move it into a glass carboy for the secondary fermentation.  The cacao nibs will be added about two weeks before we bottle the stout.  I will post an update when I know how our beer turned out!

Don't you keep a big bucket of beer in your linen closet?  Why not?

Friday, January 11, 2013

A Blanket for Roan

A few months ago I made a knit and minky blanket for my nephew/godson, Roan.  My sister-in-law loved it, and asked if I would be willing to make another blanket for Roan, one that would hold up to more frequent washing than a knitted blanket.  Challenge accepted!  Besides, it's fun to make snugly things for babies.

I am going to call this a one-nap project, because it really should have only taken me one nap to make. 

I had some orange minky on hand, and I picked up some bright blue flannel to go with it.  I started by washing, drying, and, in the case of the flannel, ironing my fabric.


After that, I cut out two large squares from both fabrics.  This took me a ridiculous amount of time, and I can't explain why.  This may have been easier if I had a larger workspace for laying out my fabric.  I don't know.  Anyway, after far too much waffling, I ended up with two squares of fabric measuring 42 inches on each side.


I pinned the fabric, right sides together, and sewed around the edges.  I ran into some trouble here, and lost some time.  Minky stretches, flannel doesn't.  Finally, with the help of lots of pins and a walking foot, I had success.


I left a four-inch gap in the stitching along one edge, clipped the corners, and turned the blanket right-side out.  I pressed the edges, then top stitched about a quarter inch from the edge.


Done!  Next time I'll be able to save time with the cutting and stitching.  I am really happy with how this rather simple project turned out, and I was a little bummed to give it away.  Luckily I picked up some super cute dinosaur-print flannel to make another blanket for Julian!

Tuesday, January 1, 2013

2013

'Tis the season for resolutions, though any day can be a new start if you choose to make it so.  My biggest goal for 2013 is a continuation of a goal I set for myself when my son was born.  I will strive to be the sort of person my son can be proud of, and I will lead by example and be the sort of person I wish my son to be.  I will be patient, kind, creative, fun, compassionate, faithful, and generous.  No problem, right?

It's a big goal, but I have someone around all the time to hold me accountable:

He's got his eye on me.

I have a few smaller goals for 2013, as well. 

I want to learn to sew my own clothing.  And I will not give up on myself when it's not perfect the first try.

I will grow a larger quantity and greater variety of produce in my garden this summer.  I will stay on top of harvesting and preserving it, and if I don't have time for preservation, I will at least bring my produce to the local food shelf so it does not go to waste.

The garden, summer 2011.

When I get stressed, or anxious, or angry, I will remember what actually matters and chill out. 


(This matters.)

Happy New Year, everyone.


Preach it, Jean-Luc!

Tuesday, December 18, 2012

Shirt FUBAR

Ah.  A few days ago, I decided I wanted to try and sew a shirt for myself.  Something elegant, and just a little dressy to wear to my nephew's baptism on Saturday.  I found this tutorial for drafting a pattern and constructing a shirt.  Nice, right?  I even had some pretty dark red fabric to use, perfect for Christmas.  So, how's it going?  HOW'S IT GOING?!?

This sums it up pretty well.


At least in my case, I'm the only one who ends up disappointed!

And really, it's okay.  The fabric was free, and I am learning from the adventure, if nothing else.

Monday, December 17, 2012

Meximac

Oh look!  It's another post about food.  I like to post about gardening and sewing/knitting projects, too, but the truth is that my garden is asleep for the season, and my other projects take several days to several weeks (most of the time) to complete.  Meanwhile, I have to eat every day, which means I cook most days.  On Saturday I made what I will call Meximac:  macaroni and cheese with a Tex-Mex twist.  It's not good for you, but it is tasty.  It is a cold and gloomy time of year; 'tis the season for comfort food (and extra trips to the gym)!

What you need:

  • 1 pound elbow noodles
  • 1 pound chorizo
  • 1 tablespoon butter
  • 2 to 3 tablespoons flour
  • 4 cups milk
  • 12 ounces (~3 cups) shredded cheese
  • 2 cans rotel
  • 1 canned chipotle, minced
  • 2 teaspoons chili powder
  • 1 teaspoon ground cumin
  • 1 teaspoon garlic powder
  • salt to taste
  • 1/4 cup panko bread crumbs

A note on chorizo:  I really do like traditional chorizo, but then I read the ingredients list.  Now I buy this brand, which contains muscle meat instead of lymph nodes, salivary glands, and cheek fat.  Purchase whatever type makes you happy.


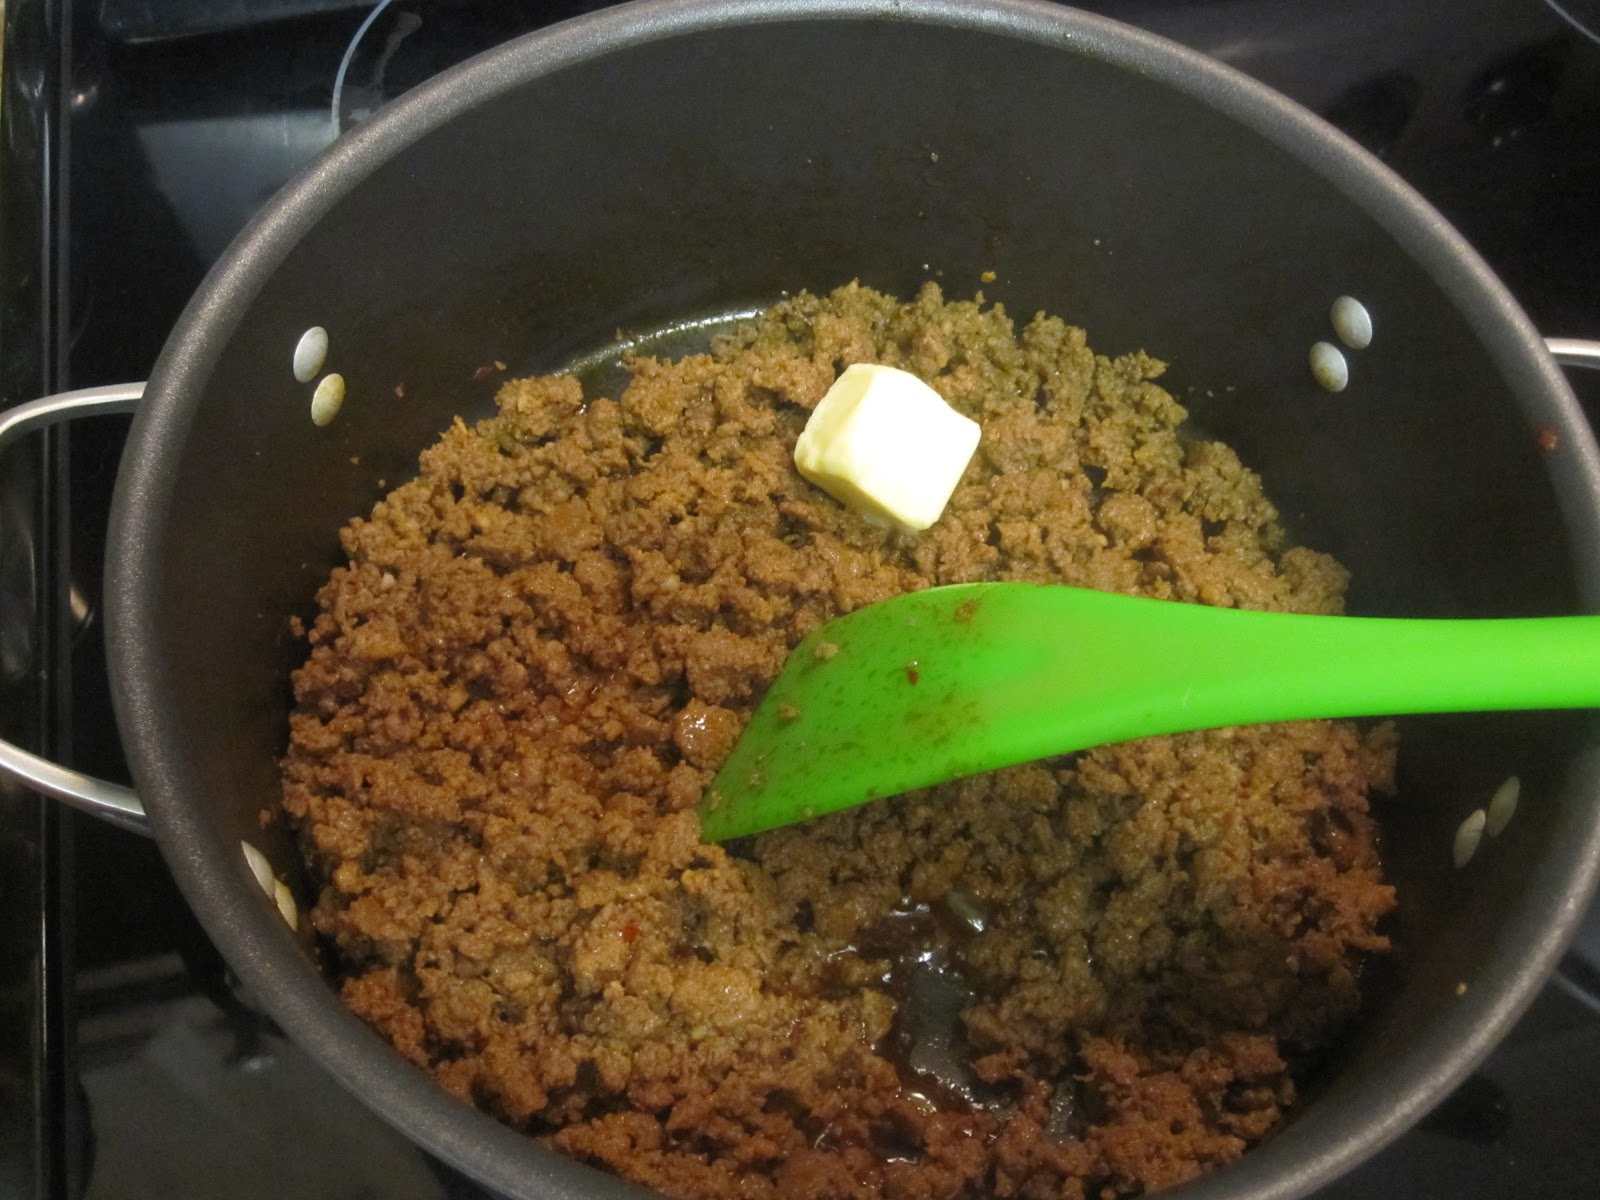
Put a large pot of water on to boil, and make your sauce while you wait.  Start by browning your chorizo.  Toss a tablespoon of butter in to melt.  When the chorizo is cooked and the butter has melted, stir in your flour to make a roux.


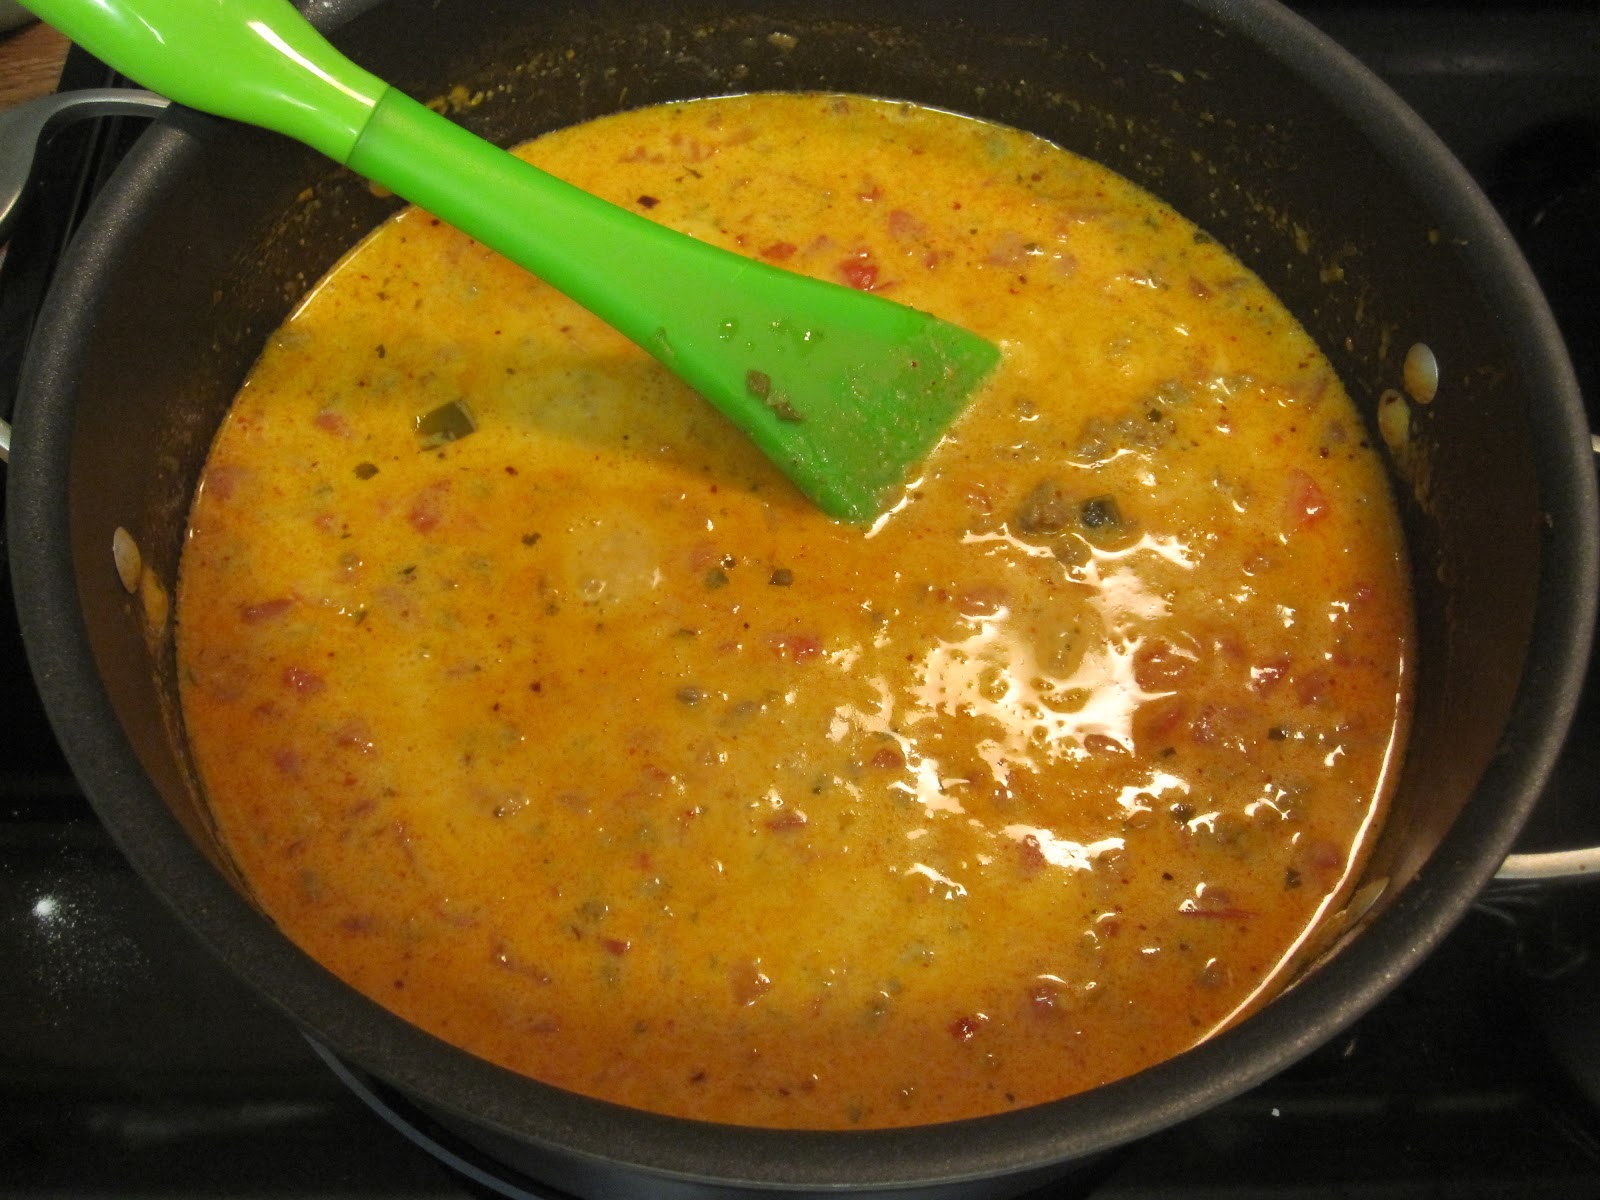
When the roux has cooked for a minute or two, stir in the milk.  I did not use enough flour and I have some fat floating on top of my sauce.  It didn't matter in the end, but looked a little gross while I was cooking.


This is my favorite variety of Rotel.  Drain your cans of Rotel and add them to the sauce along with the chipotle and other seasonings.


Keep stirring the sauce and bring it to a bubble.  Reduce the heat to low.


When your water is boiling, add the noodles and cook per package instructions, less one minute. 


Drain and rinse with cold water.


Turn off the heat on the sauce and stir in the shredded cheese.  I used sharp cheddar, but pepper jack or a smoked cheddar would be good, too.


Stir the pasta and sauce together and put it in a 9 by 13 dish.  Top it with a little more cheese and the panko bread crumbs.  Bake it at 350 degrees for 30 minutes, until the sauce is bubbly and the cheese on top has started to brown.


Allow the finished casserole to sit for several minutes before serving.  I had meant to steam some broccoli to serve with this, but I got so excited about the mac and cheese that I forgot.

Enjoy!

Wednesday, December 12, 2012

Pot Roast Stew

I love using up leftovers, especially when I can turn them into an entirely different meal.  Bonus points if I can do so without leaving for groceries.  These sorts of accomplishments make me feel clever and industrious.

On Sunday, it looked like this outside:


It was so pretty!  It was also cold, slippery, and wet.  Once we got home from church, I wasn't too keen on leaving again for any reason.  Luckily, I didn't have to!  The last time we were visiting my in-law's, my mother in law make French onion soup.  From scratch.  It was oh so good, and she sent a gallon freezer bag of the stuff home with us.  French onion soup is one of those things I don't generally make, mostly because cutting up that many onions makes me leak from all my face holes.

I had thawed out the bag of soup sometime mid-week, and still had quite a lot left.  It was still tasty, but I was growing a little weary of having onion soup, and the snow made me want a really hearty meal.  I landed on potroast.  I pulled a beef roast out of the freezer, and a bunch of carrots out of the crisper.  I don't think I've ever made potroast before, so I went on an internet quest to make sure I had a good method.  When it comes to hearty beef-centric dinners, I think of the Pioneer Woman.  She did not disappoint.  I found this recipe on her blog.


First I cut my carrots into chunks, and tossed them in a cast iron pot with a little olive oil.  I cooked them over high heat until they started to take on some color.  Like the Pioneer Woman, I did no peel my carrots.  These carrots are from my CSA subscription, and I know they were organically grown.  I also think that leaving carrots unpeeled when cooking them helps them to stay a little firmer.  I hate mushy carrots, so this is a goo thing.


After I was done with the carrots, I pulled them out and put my roast in.  I seared it on each side for about a minute or so.


Does anything smell better than searing beef?  Maybe garlic cooking in butter...


When the roast was nicely seared, I pulled it out of the pot and deglazed my pan with a half cup of red wine.


Everyone in!  It was at this point that I started to wonder if I shouldn't have found a larger pot.


Then I thought, "meh," and poured as much of the onion soup over the roast as would fit.  In retrospect, I really should have either put less soup in, or found a larger cooking vessel.

I put a lid on the pot, and popped it in the oven at 275 degrees for three hours or so.


After three hours were up, I took my pot out of the oven and pulled all the solids out of the broth.  I shredded the roast with forks and set it aside.


I put all the liquid in my gravy seperator to get rid of as much of the fat as I could.  There wasn't as much grease as I had expected, because most of it had boiled out and was all over the floor of my oven.  Mmm.  Lesson learned.


Everything went back in the pot.  I could have eaten it at this point, but I decided to put it back in the oven to warm back up first.  I served my pot roast stew over baked potatoes, and it was good.

Saturday, December 8, 2012

Baby Legwarmers

Carpe nap time!

All of my sewing gets done while Julian sleeps, and most projects take multiple days' worth of naps to complete.  Every now and again, however, I have a project that I can both start and finish during a single nap.  The viking hat I made for Julian was one of those projects.

Today I decided to make legwarmers for Julian.


Damian gave me these socks a few years ago.  I love them.  They are cozy, and cushy, and I wore them so much that I wore holes in the heels and toes.  I didn't want to toss them, though, partly because I am a sentimental fool, and partly because the leg parts of the socks are still in good shape.  These seem to be good candidates for legwarmers.


I cut off the holey feet.


Then I got to work.  My mother in law just gave me a new (to me) sewing machine.  It's super nice, and I am just learning how to work it.  I don't know what this foot is called, but it has a groovy adjustable guide.  I set it up so that my double interlock stitch would line up perfectly along the edge.


A close up of the edge when I finished.


Then I folded the edge under, pinned it, and stitched it in place with a zigzag stitch on its longest setting.  Were the double interlock and zigzag stitch the right choices?  I don't know; I was making this up as I went.


They look okay, though.  Next I had to wait for Julian to wake up so he could model them for me.


He was thrilled.  Or he's teething and wants lunch.


On the move!  I think the flames on his diaper make him go faster. 


This is the best shot I managed to get, and he's backlit.  Oh well.  He stood still for a second.


Anyway, I'm pretty happy with these.  Not a bad use of an hour and a pair of socks that needed to be tossed out.